If you already sell with WooCommerce, you are closer to a membership site than you think. You have a checkout, customer accounts, taxes and a payment gateway. What is missing is the part that says “this person paid, so let them in”, and then keeps billing them every month.
This guide shows you how to create a membership site with WooCommerce from start to finish: picking a plugin, building your first plan, locking content, taking recurring payments and testing it all before a single real customer signs up. We build membership software for WooCommerce, so the screenshots come from our own plugin, but the steps apply whichever plugin you choose.
Key takeaways
What Is a WooCommerce Membership Site?
A WooCommerce membership site is a WordPress store where customers buy access instead of, or as well as, physical products. Members pay once or on a schedule, and in return they can open protected pages, posts, products or downloads. WooCommerce handles the checkout and the customer account, and a membership plugin decides who can see what.
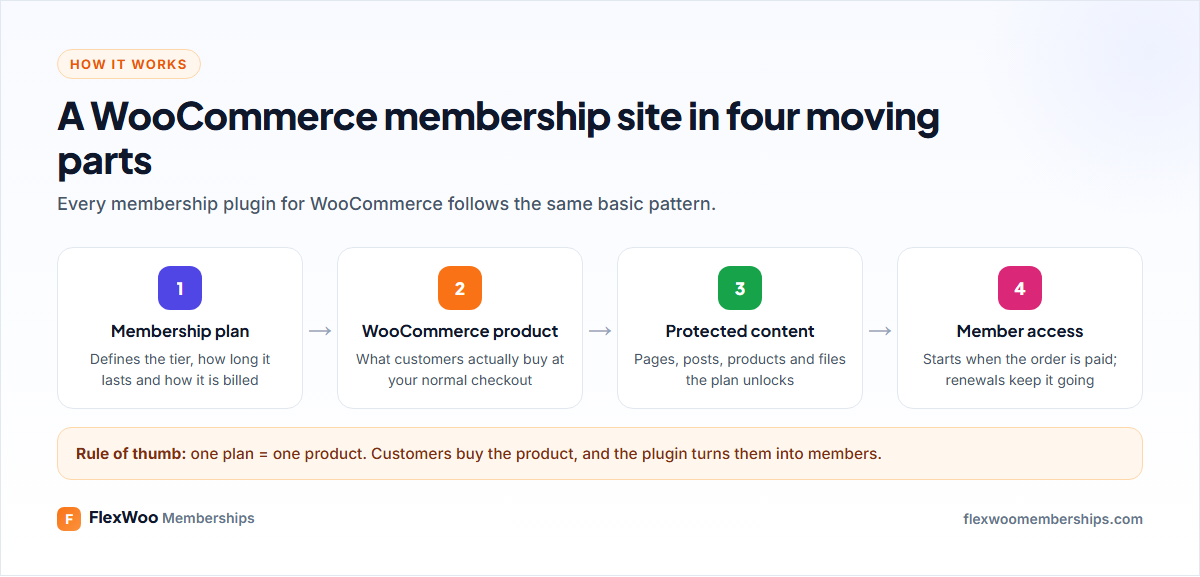
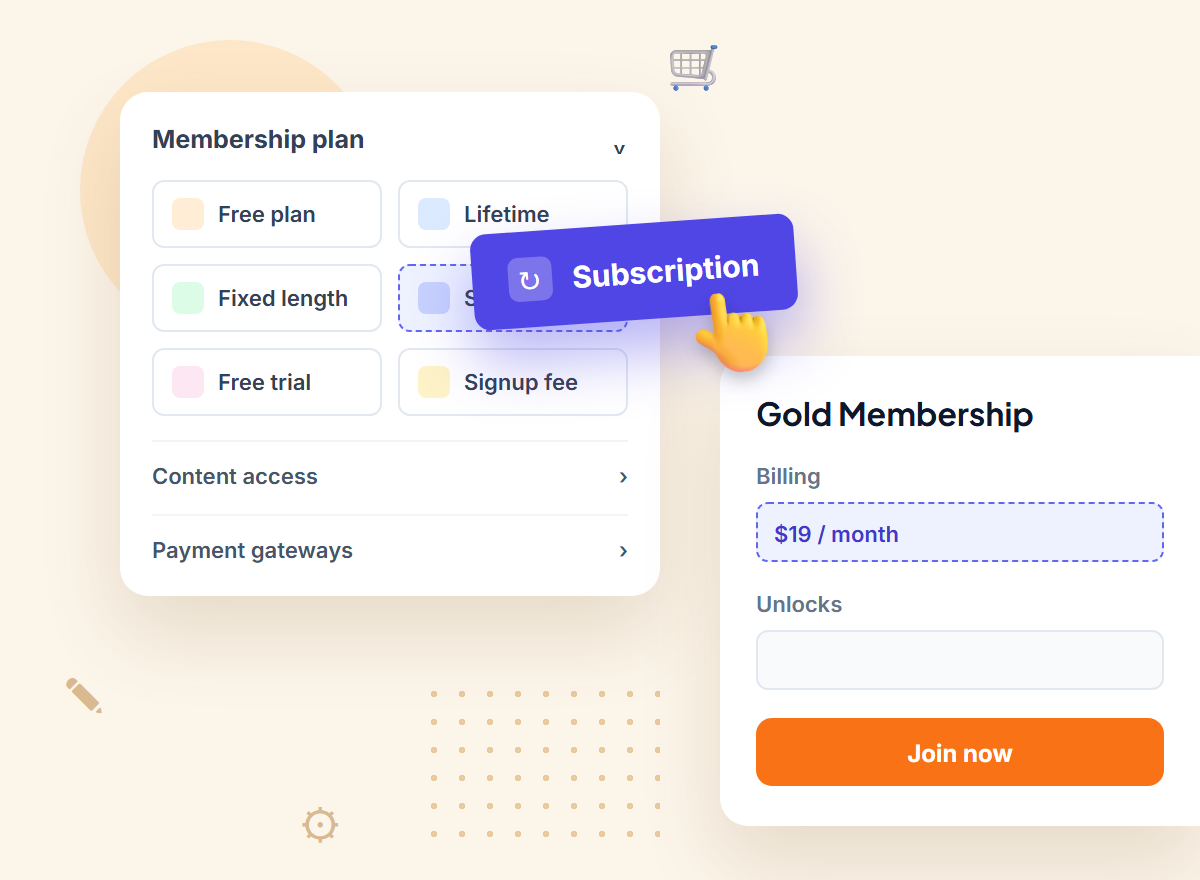
Typical examples: a yoga teacher selling a $19 monthly video library, a consultant with a paid templates area, a food blogger with premium meal plans, a shop that gives members 10% off and early access to new products. They all run on the same four parts shown above.
Why Build It on WooCommerce?
You could use a standalone membership plugin with its own checkout. If you sell anything else, though, that means two checkouts, two sets of customer records and two places to look when someone asks about a payment. WooCommerce keeps it all together.
The trade-off is that you look after a WordPress site: updates, backups and decent hosting. If you have never run WordPress before and only want to sell one course, a hosted platform may be easier. If you already have a store, WooCommerce is the natural home.
What You Need Before You Start
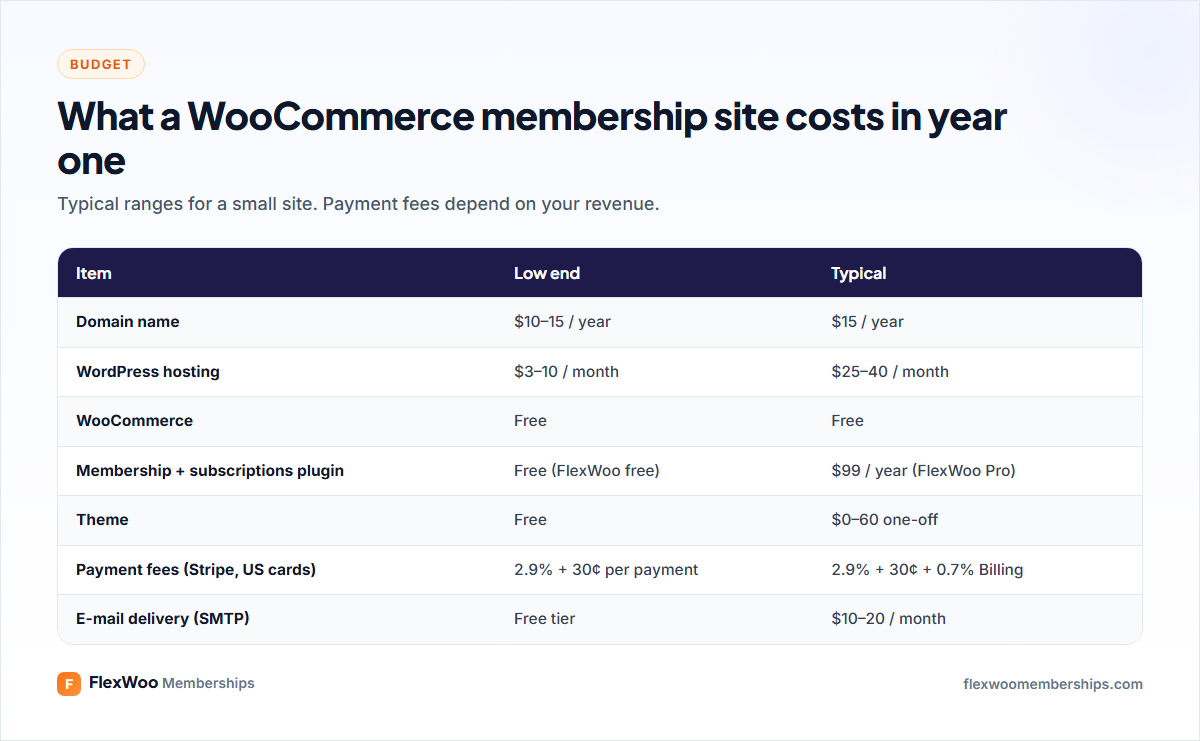
The budget table above is for a small site. Your biggest cost after launch is usually payment fees, which grow with your revenue. Payment fees are covered in detail in our Stripe vs PayPal comparison.
Step 1: Plan Your Membership Before You Build It
Ten minutes with a notebook now saves hours later. Answer these four questions:
Stuck for an idea? We collected 12 membership site ideas that make money, with real price points.
Step 2: Choose a WooCommerce Membership Plugin
Core WooCommerce cannot restrict content or bill on a schedule, so a plugin does the work. When you compare options, look at three things: whether recurring billing is included or sold separately, whether there is a free version to test with, and what the plugin costs after the first year.
| Plugin | Recurring billing | Free version | Price |
|---|---|---|---|
| FlexWoo Memberships | Included | Yes | Free; Pro from $99/year |
| WooCommerce Memberships | Needs WooCommerce Subscriptions | No | $199/year + $279/year |
| Paid Memberships Pro | Included (own checkout) | Yes | Free core; Standard $499/year |
| MemberPress | Included (own checkout) | No | From $199.50 first year, then $399/year |
Paid Memberships Pro and MemberPress are strong plugins but run their own checkout next to WooCommerce, not inside it. We compared ten options side by side in our guide to the best WordPress membership plugins. For the rest of this tutorial we use FlexWoo Memberships, because the free version covers every step.
Install it like any plugin: go to Plugins → Add New Plugin, upload the ZIP (or search for it), click Install Now and then Activate. A new FW Memberships menu appears in your dashboard.
Step 3: Create Your First Membership Plan
Go to FW Memberships → Memberships → Membership Plans and click Add New Plan. Give it a name your members will recognise, such as “Gold” or “Studio Pass”, set the status to Active, and choose a plan type.
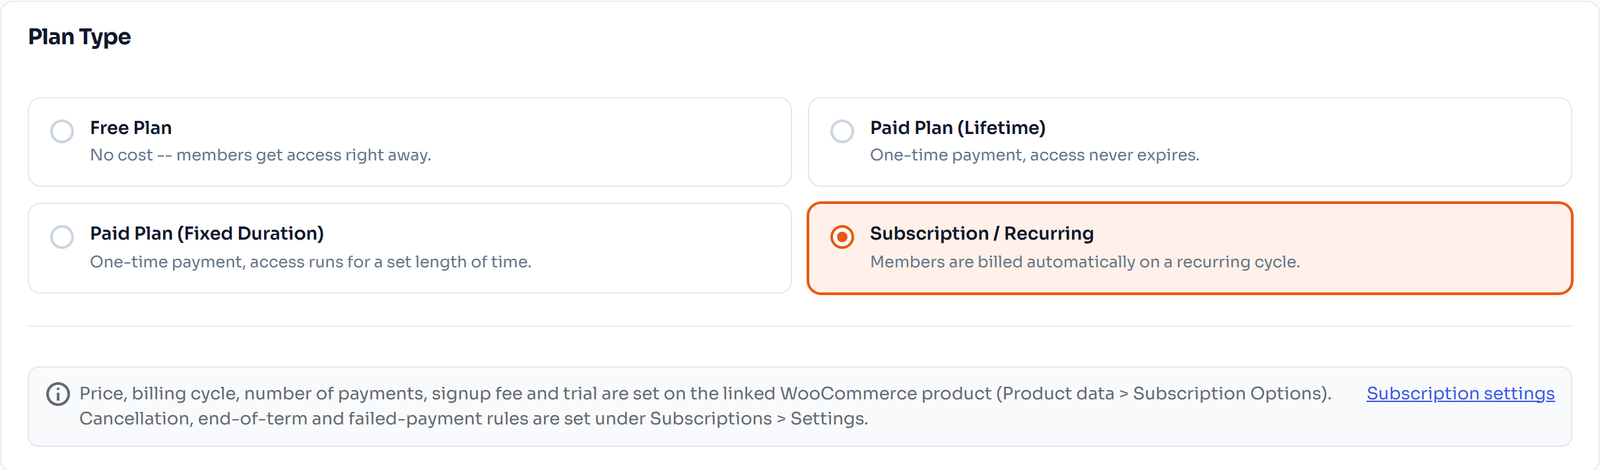
| Plan type | How members pay | Good for |
|---|---|---|
| Free | Nothing | Community tiers, lead magnets, gated freebies |
| Fixed duration | Once, for a set period | Event passes, 90-day programs, seasonal access |
| Subscription | Automatically, every cycle | Content libraries, communities, coaching |
| Lifetime (Pro) | Once, access never ends | Launch offers, evergreen courses |
Two small settings are worth a look now. Approval after purchase decides whether the membership starts as soon as the order is paid or only when you mark it completed. And under Memberships → Settings you can give a free plan to every new account automatically, which is a handy way to grow a list before you charge anyone.
Step 4: Connect the Plan to a WooCommerce Product
Members join by buying a product. In the plan, switch on Allow access to this plan after purchasing a specific product and pick a product, or click Create Product to make one with the plan’s price.
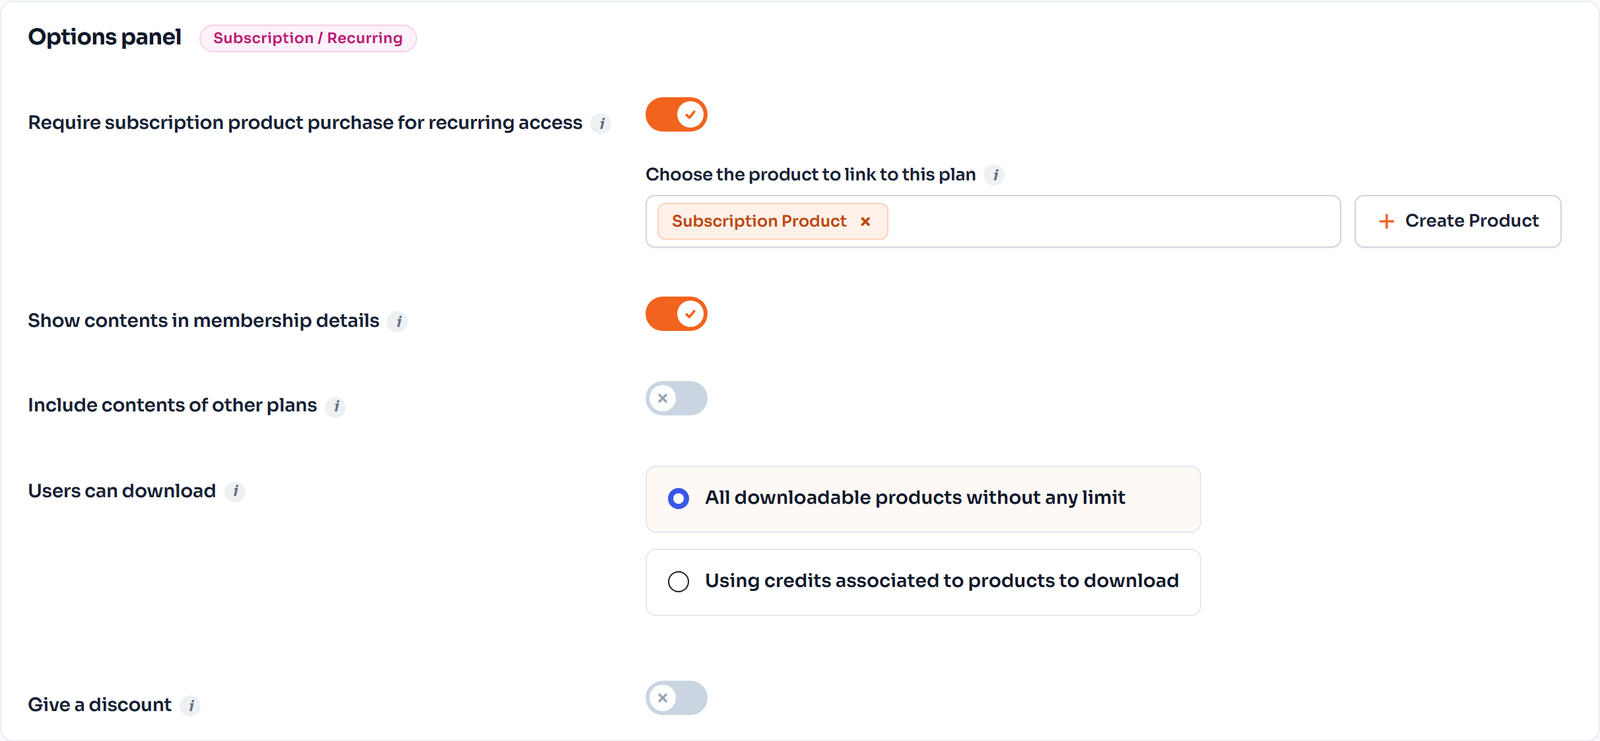
For a subscription plan, open the product, tick Subscription under Product data and set the price and billing cycle. That price is what each renewal costs.
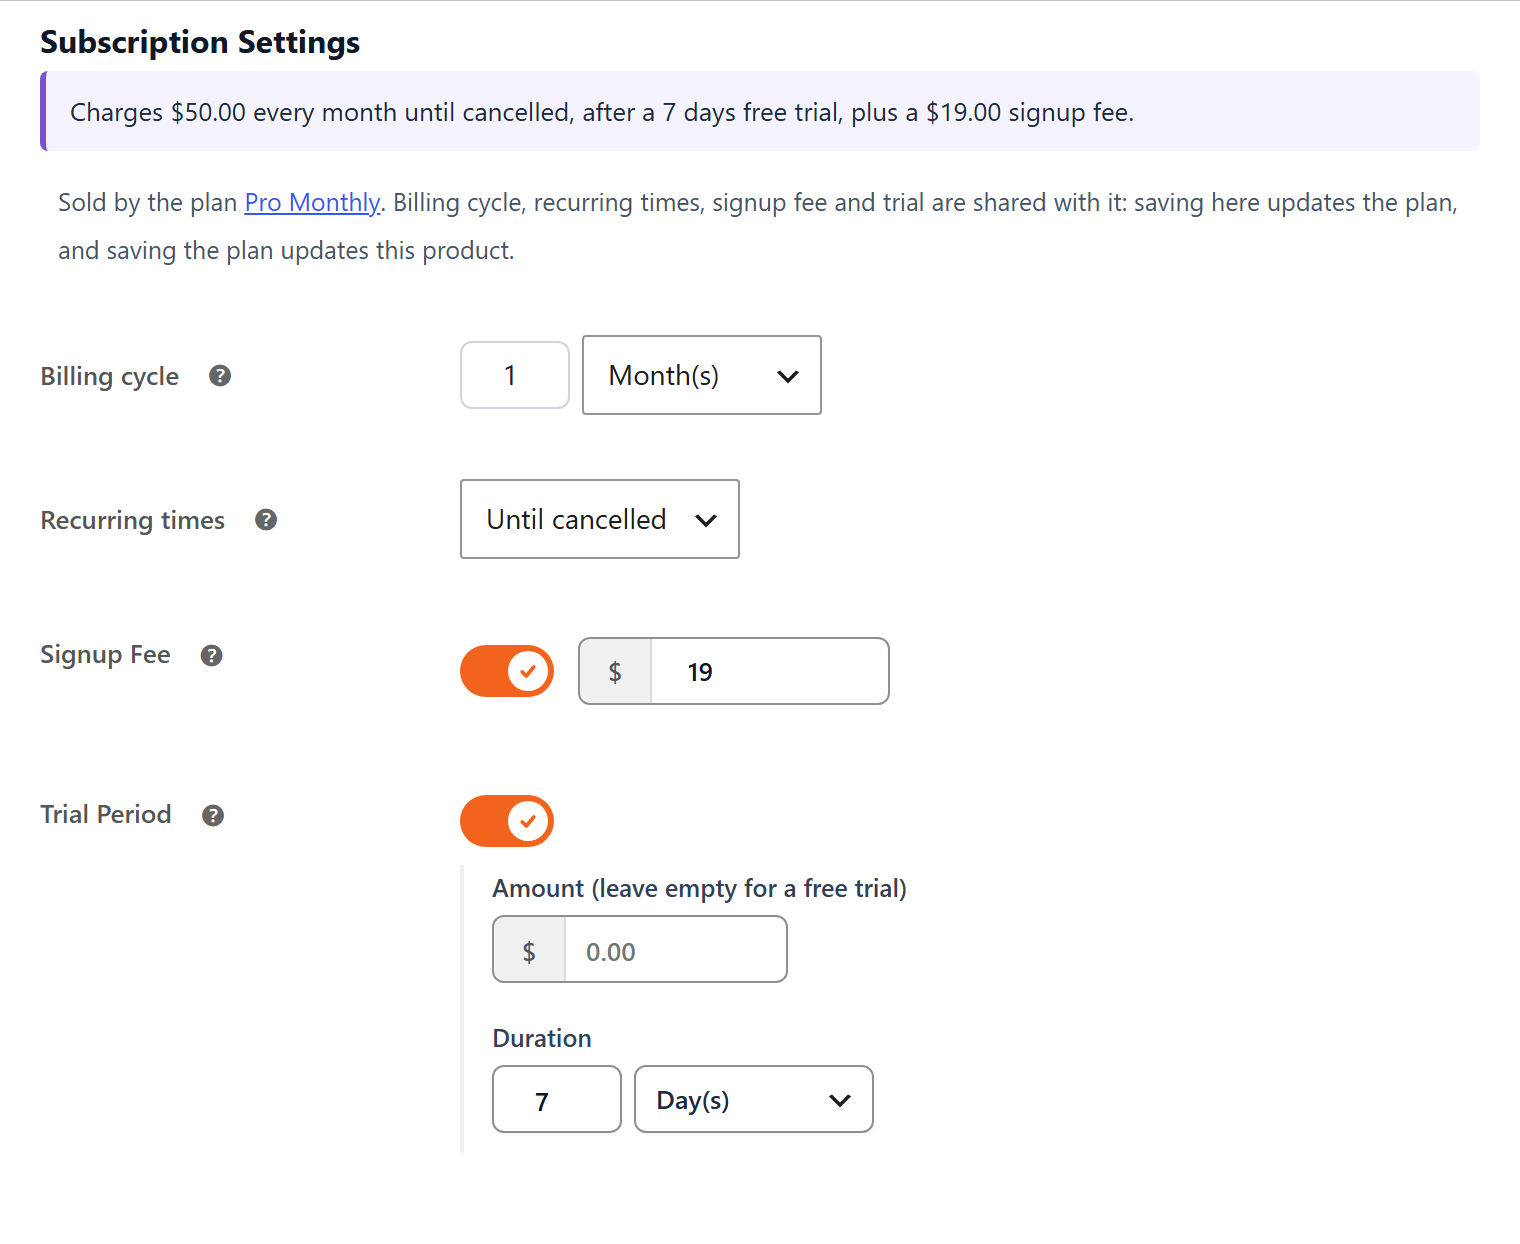
Free vs Pro billing: the free plugin bills every 1–7 days or every 1–3 weeks, which suits weekly classes or boxes. For the classic monthly or yearly membership, plus free trials and signup fees, you need FlexWoo Memberships Pro. Plan for this before you set your prices.
By default customers need an account to buy a membership, because the membership is attached to that account. Subscriptions always create one, since renewals need it. You can allow guest checkout for one-off plans under Memberships → Settings.
Step 5: Choose What the Plan Unlocks
Back in the plan, the content section lets you pick what members can open: specific pages, all posts or specific posts, post categories and tags, products and product categories.
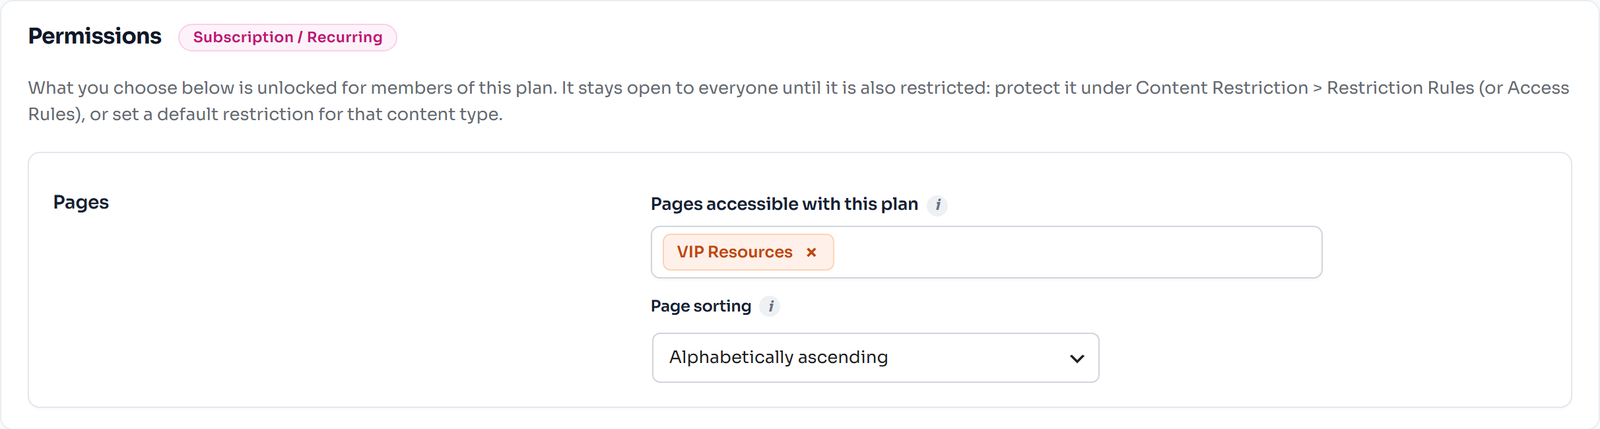
Here is a tip that saves a lot of clicking: unlock a category instead of single posts. Make a “Members” category, unlock it in the plan, and every post you publish in it later is protected automatically. If you add tiers later, a higher plan can include everything a lower plan unlocks, so you do not repeat yourself.
Step 6: Decide What Non-Members See
A locked page still needs to sell. Under FW Memberships → Content Restriction → Restriction Rules you pick one of three behaviours for visitors who are not members:
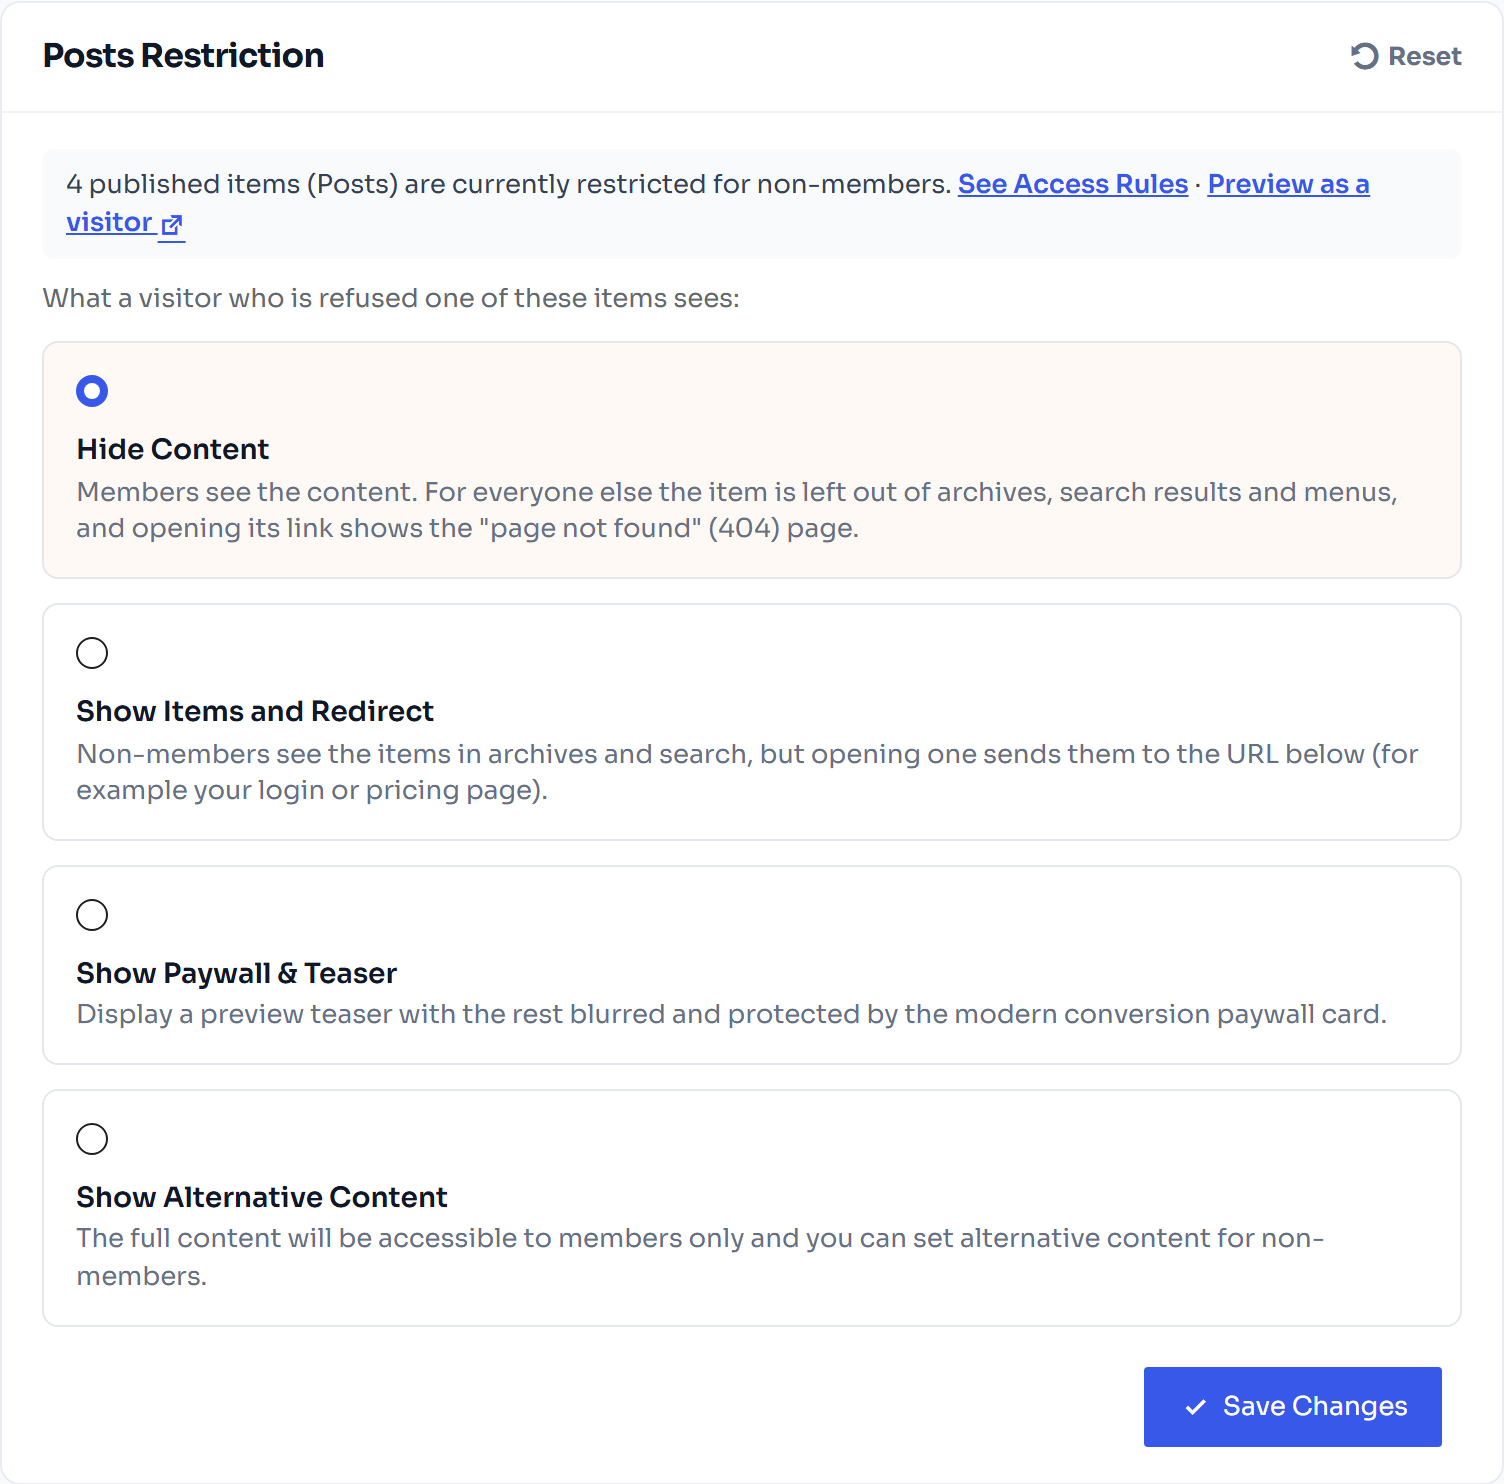
Your shop, cart, checkout and My Account pages always stay open, so nobody gets locked out of buying. For the full picture, read our guide on how to restrict content to members in WordPress.
Step 7: Set Up Recurring Payments
One-off plans work with any WooCommerce gateway. Automatic renewals need a gateway that can charge again without the customer, and FlexWoo has three free ones: Stripe, PayPal and Razorpay.

With Stripe, for example, you install the gateway plugin, paste your test API keys, click Test connection and create the webhook so Stripe can tell your site about renewals and refunds. Our step-by-step guide to Stripe recurring payments in WooCommerce covers every screen, and there are matching guides for PayPal and Razorpay.
One more thing people forget: set up a real server cron job. WordPress only runs scheduled tasks when someone visits, so a quiet site can send reminders late. FW Memberships → Tools → Cron Jobs shows the exact command to paste into your hosting panel.
Step 8: Build the Member Experience
Members land in WooCommerce’s My Account page, which gets Memberships and Subscriptions tabs showing each plan, its status, the next payment and the renewal history.
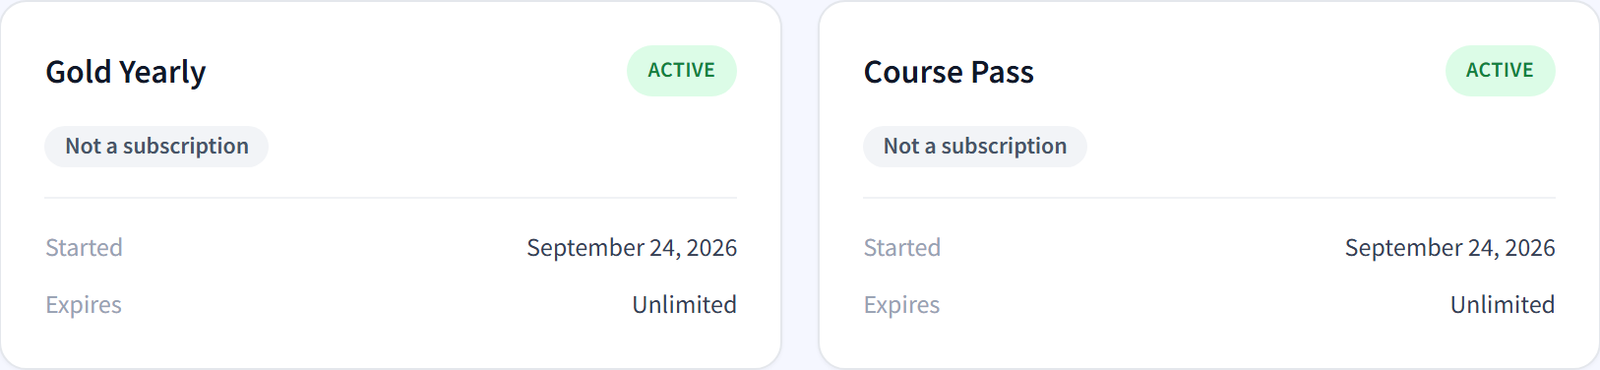
A few small touches make a big difference to how professional the site feels:
Test Everything Before You Launch
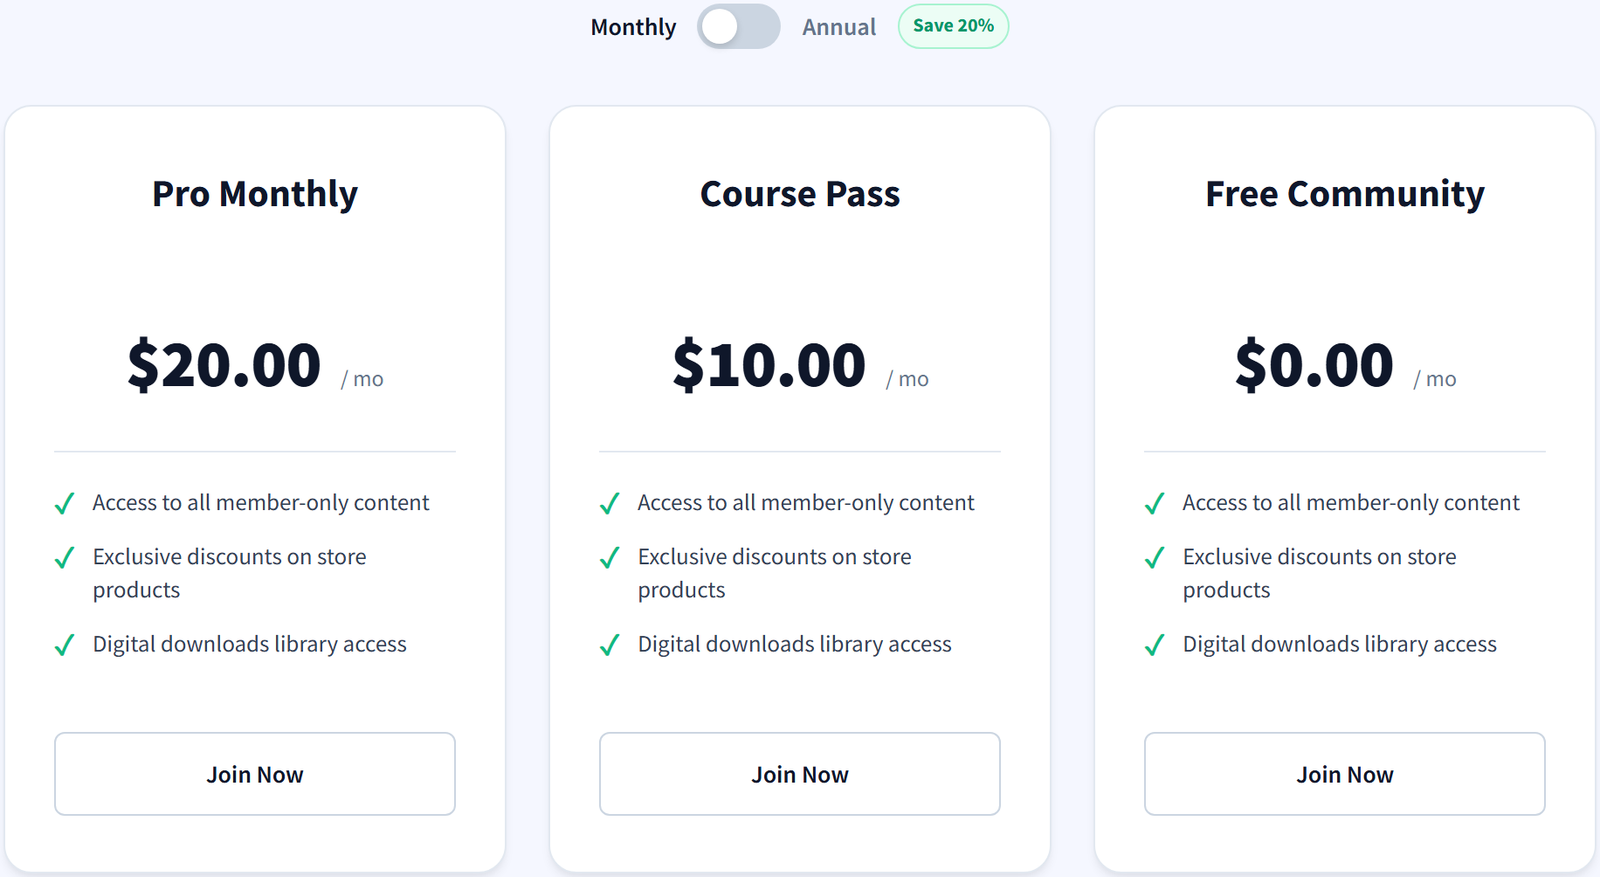
This is the step people skip, and it is the one that saves you embarrassing support e-mails. Do it in a private browser window, logged out.
The Access Rules table under Content Restriction is a great final check: it lists every page, post and product with the plans that can open it.
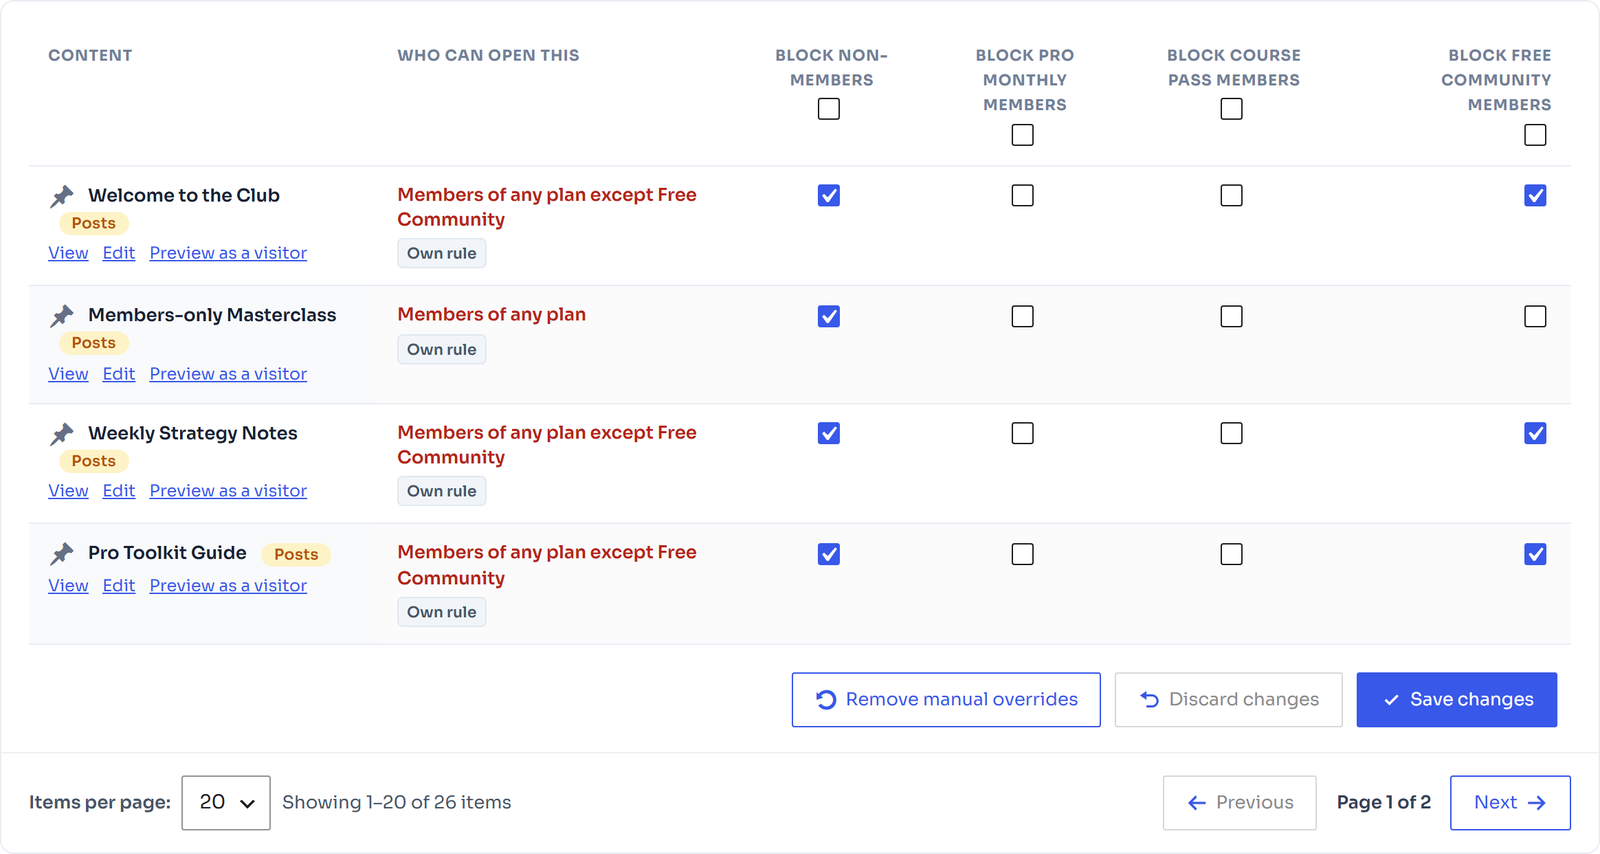
When you are ready to go live, work through our membership site launch checklist. It covers the 25 things we check before every launch.
Common Mistakes to Avoid
FAQ: WooCommerce Membership Sites
Ready to Build Yours?
A WooCommerce membership site comes down to four things: a plan, a product, the content it unlocks and reliable billing. Get those right, test as a real customer, and you can launch in an afternoon. Then spend your time on what actually keeps members around, which is the content and the community, not the settings.
You can follow every step in this guide with the free version of FlexWoo Memberships: